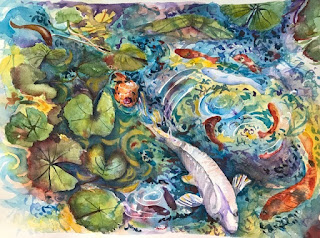
This Fall Garden will likely be my subject for a one day work shop October 17th in Marble Falls at Galleries at Pecan Creek. I will provide the pre-drawn sketch and this method is beginner friendly. Also good for adding some new methods for experienced painters. So let's work on the game plan for that and for those interested in my current favorite paint process that uses just 3 transparent watercolors to create a vibrant, glowing painting. You can and should experiment with any transparent red, yellow or blue combination you like but I selected these great mixers. Not all brands carry this red but M Graham does; good paint if you haven't tried it :

Hansa Yellow / Naptha Red / Prussian Blue
Step 1: Design and sketch your image on 140 lb paper that has been taped to a board. I use clear package tape leaving a 1/4 " border on all edges. Varying shapes and leaving openings for the viewer to enter your scene, mask white or highlighted areas. I use Pebeo masking fluid ( blue lines) and apply it with the back of my brush handle for easy cleaning. It must be completely dry before adding any moisture to the paper. The same is true ( of your paper) when removing the mask: it must be completely dry or the paper can tear. I recommend 24 hours.
Step 3: Complete your sprayed and "pushed" under painting. Use your fingers and any tools you like but don't use a brush. Don't over plan this too much...the less you control this stage, the better the results will be.
I do want to share that I used this method to do a 1 1/2 hour demo for the Center Art Club in Round Rock last week. Thank you to Janet Fulks and Tracie Storie who invited me after seeing my demo at Georgetown Library on July 9th. I was delighted with the attendance and the interest since these artists come from a variety of mediums including sculpture. And what a state of the Art facility they have to use! Round Rock has cretaed a beautiful environment for seniors ( over 50) to take classes, dance, create and even have lunch. Underground parking is also available at the BACA Center.
"Bath Time at the Oasis" is the completed demo painting done for Center Art Club:
Thank you to both of them for inviting me to share my ideas. Contact me if you have any questions about your painting or are interested in my one day work shops!


Comments
Post a Comment